Showing posts with label buttons. Show all posts

15.10.12

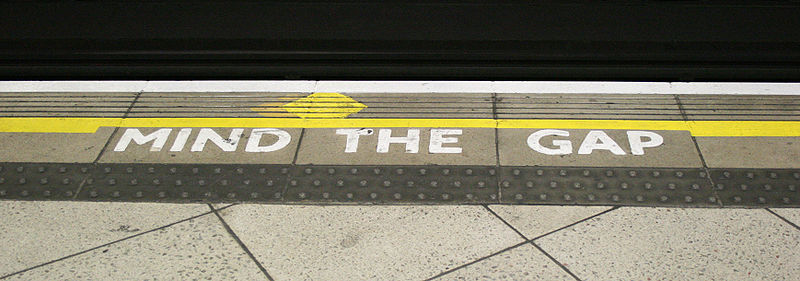
Mad Scientist Monday #23: Learning how to mind the gap...easy fix for blouses and shirts

Day 295

I know its been a long time blogging but in my defense I have been busy, crazy busy with sewing orders and stepping toes into the local film industry costuming, set and the like.  Today our Mad Scientist is the 'Other Mother' from the book Coraline by Neil Gaiman.  Perfectly creepy as a book for (not too young) kids, teens, adults and as a read aloud for extra scary bits.  You can read about it more in this great review I found online if you are not familiar with Gaiman's work already.  So as not to give it away if you have not read Coraline, the Other Mother makes your choice to stay in her world permanent by sewing black buttons onto your eyes.


In tribute to this little bit of creepy we are going to learn how to sew snaps into the gap of a shirt.  I call this the 'Boob Gab' because all of us who are well endowed on top know button down shirts don't leave any surprise as to what we are wearing underneath.  To fix this we generally buy bigger sized shirts and look like we are swimming in them, wear a bra color that blends or never buy buttondowns ever again entirely.  I will help you get over gap trauma, even if you say you can't sew you can do this and learn to love button downs again.

You are going to need:
Hand sewing needle (About an 1 1/2" long and thin)
Thread to match your shirt.
Pencil
Sewing & Knitting Gauge (see photos)
Snaps (smaller than your button size but not the tiny ones) nickel or sliver if lighter colored shirt and black if dark

Look it's a gap. Usually we notice because someone has said 'oh nice bra color you are wearing today' or they don't say anything but obviously uncomfortably (for the gap wearer) stare right through the gap into your bare naked soul causing you to want to throw on a full body parka, run screaming from the room or commit an act of violence against the starer.  Unless you have a job where the boob gap is an asset then this fix is for you.

The boob gap usually occurs after the 3rd button down, counting the one at the neck.

We are going to place our snaps halfway between the 3rd and 4th button.  Your gap placement might occur at a different location so make sure you put your shirt on and check the location before sewing.  Use your gauge to determine the center point between the buttons. I measure from center of top button to center of bottom button to get the perfect central snap location.

See the hole in the blue gauge marker?  Place a light pencil dot right through the hole marking the center point.

Next we want to measure how far in from the edge of the shirt to align with the button row.  Move your gauge in until the tip is even with the center points of the top and bottom buttons.  Mark lightly with a pencil.  These marks should be right on top of one another if you have measured correctly.  Always best to measure twice, sew or cut once~usually I do it three times and then stand back to look and make sure.


Here I am marking my points.

You get to do your measurements all over again for the buttonhole side!  Instead of the center of the buttons as your top and bottom points use the center of the buttonholes.  Don't just take it for granted that they are absolutely aligned from one side to the next because not all clothes are manufactured of equal quality.


Now you get to sew them on.   While there are only so many ways to sew EVERYONE sews on buttons and snaps differently so do what is comfortable to you.  

Thread your needle and a simple knot in your thread at the bottom.  Work the side with the buttons first.  Staying on the snap side make a stitch through the marked point pulling the thread through to the knot.

Take the female part of the snap and hold it onto the marked dot with your finger or thumb of the hand opposite of the one you sew with.  Coming up through the top layer of fabric only each time (don't sew through to the back, there is usually a double layer of fabric at least for button plackets), using small stitches, go through one of the 4 attachment holes up to 6 times.

To go to the next attachment hole make a small stitch diagonally through the top layer of fabric, behind the snap and come up through the next hole.   Do this with each hole until you come back around to the first one.

To finish the thread I like to make a couple of horizontal stitches through the fabric, back and forth behind the snap.  Then I tie the end to one of the stitches, weave the needle and thread out the other side and snip.

Next you will sew the male side of the snap onto the marked point between the buttonholes on the other half of the shirt.  Proceed in the same manner as described above.  Since this is the side of the shirt that people see make sure your stitches do not show through and stay within the layers of the button placket.

NOTE: When you take them off the cardboard sheet them came on you will see what I mean about female and male parts of the snaps.  It's simple Snap Biology 101.

Another tip is if you are very well endowed DON'T give in to the temptation to purchase a ginormous shirt thinking that will help close the gap.  Fitted is always, always a better option~add multiple darts around  the waist if you have too.  If the gap is still there sew another snap between the 4th and 5th buttons or in the center directly below the other one (between the next two buttons) so that you will stay covered.


Gap minded. 

What will you create today?
2.7.12

Momtastic's Whimsey #3: Decorate Your Hair


Day 292 Have you received your Whimseybox of craftiness or want to know more about what it is?  Click here to check out Whimseybox's website. 

 I am a member of the Whimseybox Design Team and will be putting together weekly crafts and projects based on the items that come in the monthly boxes.  What I am going to try to do for my participation in the project is A. use primarily what comes in the box and B. not buy new supplies to enhance those projects but use what I have around the house.  I am proud to be a part of a group of extraordinarily crafty people.  If you want more ideas check out Whimseybox's Portfolio of projects.

I could not resist that dark purple ribbon that decorated May's box.  Seeing ribbon makes me think of historical times when ribbons were the jewels of the sewing world, cheaper than lace and they added a bit of color or shine to an outfit.  I love the idea of wearing it in my hair to add a simple decoration of color to brighten the day.

DO NOT let the fact that this uses hand embroidery intimidate you, you CAN do this!  Remember to have fun!

Supplies from the April Whimseybox:
various buttons

Supplies from the March Whimseybox:
Ultra Fine Point Sharpie

Supplies from the May Whimseybox:
J&P Coats Embroidery Floss in Imperial Blue
Purple Ribbon

Other Supplies:
Scissors
Ruler
Hand Embroidery Sewing Needle
Scratch paper or sketch pad
Dreams & Imagination
UPDATE: Ribbon action shots


The finished hand embroidered ribbon headband.

Supplies that arrived in the May Whimseybox with the marker and buttons added from previous boxes.
  
The ribbon is about the width of this ruler which made it easier to draw lines to test  my designs.

First onto your sketch pad or scratch paper trace a line in pencil on either side of the ribbon.  Use the ruler to keep it straight. Do a few of them if you want to try some different designs for embroidery.

Pencil lines sketched to the width of the ribbon.
This will allow you to use the size of the ribbon to sketch out some embroidery ideas.

Sketches for the ribbon embroidery.
I sketched out a few designs before it coming down to these two.  I was going for pebbles or cobblestones scattered across the ribbon or chains linking the buttons.  I ended up deciding on the chains.

Choosing the thread and buttons.
 I chose 3 green flat buttons (ones with shanks might poke too much) and while I was going to work with the Violet Dark thread I felt I wanted more contrast instead and went with the Imperial Blue color.

Preparing to trace the design onto the ribbon.
Since the ribbon is too dark to really effectively transfer your design placing the ribbon next to the design on your paper will make it easier to free hand the image.  Using your fine line Sharpie marker draw the 3 circles where you buttons will go first in the same location as your design centered on the ribbon.

Design is ready for embroidery.
Using the Fine Line Sharpie again draw 4 'smiley face' lines (in place of the chains on my sketch) connecting the buttons.  You can see the 'smiley faces' in the image below.  I went almost to where the buttons would be going but you can even connect the lines if that works better for you. 

Needle is threaded and ready to embroider.
Cut off approximately 12" of your embroidery thread.  There are 6 strands in your thread, separate them into  2's, so that you will end up with 3 lengths of 2 strands each. 

Did your threads tangle and snarl when you tried to separate them?
Let's try again.  Either cut another length or smooth the snarled threads back into a line.  Hold the strand in between your fingers and let it hang down.  Look close, you should be able to see the tops of the 6 threads, pull on them one at a time, SLOWLY, and pull them up and away from the rest of the threads.  Once you have them all separated take 2 of them and smooth them back together leaving the others in a safe pet and child free/proof zone for you to come back too.  

Now thread your needle!! Here is how I personally do this:  
needle in left fingers with eye visible on top
smooth end of thread with fingers or wet it a touch by 'kissing' it between your lips
then thread it into the eye and pull about 3" through
(Bad eyes or unsteady hands? There are needles with slots in the eye that help you place the thread in them or use a needle threader.)
set your needle and thread down on the table
for this project make a small knot in about 1" from the end of your thread length so that it won't come through the fabric
Now you are ready to sew!

Tip:  Are your loose threads suddenly missing and you SWEAR you put them on the table in front of you?  Don't fret just look on the floor, your pants or generally your elbow where they usually hide, thread likes to cling especially to other fabrics!

Make a tiny knot in the end of your thread length.
Starting at the left side of the 'smiley face' furthest to the left we are going to make Chain Stitches using the line as your center.  (AHA NOW you see why I drew a line instead of chains to follow!)

Chain Stitch
No really its EASY just breath and have confidence!
To make the first chain stitch in your chains.
Start at the tip of the furthest line to the left.
Bring your needle (with thread) up through the fabric until it hits the knot.
Bring the needle back down right next to, nearly on top of the first stitch.
Slowly pull the needle and string through the underneath part of the fabric leaving enough for a tiny (appx. 1/4") loop.
Now bring your needle up on the line approximately 1/4" away from the first entry point.
Make sure the needle is at the tip of the loop on the inside.
Your subsequent stitches will start approximately 1/4" away from each other on the line with each one forming the next loop and holding the previous loop down.

To finish instead of making another loop you just come down on the other side of your last loop and make a knot on the underside of your fabric.

You probably have enough length along the 12" to do an entire 'smiley' of chain stitches.

Your stitches might not be perfect and they might wobble a little but each stitch is a learning experience and NO ONE but you will notice that you messed up.  If it really bothers you, you can snip it out and start again but with this type of fabric the holes will show and it tears easily so be careful.  You can see in the image below my stitches were not perfect because it has been a while since I have worked this stitch and I was not paying attention as closely to the sizing and wobbled a bit but NONE of this is noticeable unless you look up close and know what you are looking for!

Here is a great video at one of my favorite hand embroidery and stitching websites, Needle N Thread

My sort of wobbly chain stitches.
Last you get to add the buttons.  This is a little tricky just because the fabric is slippery but there are only 3 and no holes to make so easier than buttons for clothing!

Find the center of where each button will go and place a tiny dot with your Fine Line Sharpie.
Using 2 strands approximately 8" in length with a knot in the end poke the tip of your needle at the dot just far enough through the fabric so that you can place your button on the top of it.
Holding your button in place with your thumb pull the needle up through the hole and then back again down through another hole in the button.
Alternating buttonholes continue on this pattern until the button feels secure.
When you are finished, on the backside of the fabric, thread the needle through the back threads of your button and knot to secure.
You will need to do each button individually.

Remember this is not couture, everyone sews their button threads differently so side to side or criss cross is NOT important to this project.

Tip: DO NOT pull the thread too tight or it will pucker behind the button.

The finished beautiful ribbon for my hair.

Sneak peek at next week's Whimsey
Using the sketch pad and the fine line marker!

What will you create today?

17.6.12

Get My Thrills Thrifting #11: Sewing Attachment Jackpot

Day 290: Thrift store treasures have been few and far between lately, but that is how it is when you are searching feast or famine.  Yesterday it was definitely a good day with a box full of little feet that I have to do some more ID research on, a Singer ZigZag and a Singer Blind Stitch Hemmer attachment.  Then at another store a box full of WWII brass jacket buttons.

Things have been so incredibly busy around here lately and while I miss blogging I am very blessed to be able to be this busy with  my sewing.  If you follow me on Facebook you can see some of the things I am working on, I can only show pictures of some of it but some stuff you have to wait to see until after a photo shoot or the fashion show coming up!


What will you create today?

31.12.11

I get my thrills thrifting #4: All we got for Christmas....

Day 230:  This Christmas my hub and I were determined to only get things we found within a certain price range (read dollars and change) at local thrift stores and flea markets.  So we either were given or gave these things as is or we used them to put together into other gifts (that will be the Mad Scientist Monday post).  Here is just some of the awesomeness: 
A White sewing machine virtually untouched beneath its cover.  I don't think the original owner ever touched this or sewed from it at all because everything was brand spanking new when we lifted off the cover.  


My girls found this Sewhandy by Singer for me as a Christmas present.

An adorable machine for kids beginning to sew on.  

This wasn't really on Christmas but afterwards because I was searching for buttons for a project.  A lovely grab bag, you never know what will be inside.

How mod are these?

Spools of thread dug out of a tool box of all places at a local thrift store.  I am surprised at the good condition of the thread.  I often use thread from the thrift store in my hand stitchings.

This lot of vintage blue buttons was a gift from my kids.  The ravens on top were just gift tags to use for contrast because I couldn't get the color to come out right.

These 2 are among my most favorite gifts, a vintage scale and an electric pencil sharpener!

Some vintage mysteries I found for my girls for Christmas presents.  There were also some amazing vintage Sonic the Hedgehog comics as well.

One of the best was a tea set that belonged to my hub's mom that she played with as a kid.   My youngest loves tea sets and playing tea with her American Girl dolls and this was a big surprise.  You can see some of the vintage cookie cutters that we also put in their stockings too.


All in all it was a great holiday.  Great in that we all got things that we will cherish and use and were meaningful to the recipient.  This took a lot of planning and luck but I think it will be a tradition that we will continue from now on....one bonus was we only had one bag of recycling because there was very little packaging and we didn't have to wrestle with any unopenable plastic boxes YAY!!

I'm going to go get that new to me White machine up and running today. What will you create today?

2.8.11

Having the Time to DO Art

Day 162

Our life was on hold for the past year or so it seemed...why?  we as a family allowed albeit slowly a sports activity to infiltrate our lives so that in the end that was all we were doing.  It was NOT a life.  Along with other reasons we pulled back, reflected, made some different choices....it was one of the hardest and best decisions we have made.  


As a parent in today's western society we want our kids INVOLVED.  This means we run our kids all over town, eating on the run, living out of our cars just so the kids can have what exactly?  An activity-centric life where your whole world revolves around that activity, your discussions are all about that activity, your meals are planned around that activity, you even find yourself doing the laundry for just that activity despite the load of laundry you just left on the floor wet because you need your ___to be dry before you have to leave.  All of this craziness is designed to give your kid that mythical edge for their future~and lets face it for the most part it is a myth because MOST kids who start that activity when they are 6 are not going to want to be giving up their life to it when they are a teen.  And VERY FEW kids make the big leagues, get the scholarships, get the sponsors...seriously people DO THE MATH the STATS don't lie!  And when you reflect on your life do you want to know that your kid only did that activity because you wanted them to?  Is this your dream or theirs?  If your kid showed signs they needed a break or to stop something entirely would you notice?  Would you talk to them about how they feel?


We have taught our girls that if something you used to love to do is not going the way you want it.....talk about it, reflect and make the changes you feel is right.  Our girls have both left other activities in the past, things they had done for a while, with our full support.  I feel like the girls have the strength in life to say 'when' and make a change even if it goes against the crowd...to be true to themselves.  There is always sadness when a chapter closes and then excitement for the next adventure.  This particular transition was hard, VERY hard.  It was an extremely unpopular decision that we made, it caused a lot of stress but the minute we actually did it we knew it was the right direction because our relief was tangible.  We could actually see the kids relax.  And this time we did not leave the activity entirely we decided to join another group and suddenly our kids were finding the FUN again and really isn't that what IT is really about, the KIDS having F-U-N???!!!


As the weeks have passed we realized how much we had given up~how much this activity had eaten into the routines and rituals that made us a family.  Our family ties were dying a slow death, our closeness destroyed because we had allowed this to pick away at our lives.  Oh don't even roll your eyes, who are you kidding you CAN'T have it ALL....oh we tried to have balance at first but when you are exhausted from running and running in different directions it is easy to get into bad habits.  What had we had given up!  What a lesson indeed!


We don't expect to be the same family we were BEFORE but we do know that we are a stronger family.  We know that we are stronger and healthier~better prepared for next time.  What a ride, what a journey!


All this time to rest and reflect has found the girls creating again in their various mediums...G1 really wanted to create her own poster of a character in one of her favorite video games.......(she started this a while ago but was finally able to finish it YAY)....
Sketching a character from one of her favorite video games.

Painting the poster of her original sketch of a character from a favorite video game.

Finished poster
....this weekend she wanted to do more paper collaging....a chimera (or 3 headed winged dragon)...she sketched it out, came up with the idea to rip pieces of construction paper...she is working on the background and more dragon details today...


ripping paper and glueing


Paper Collage Chimera
G2's art generally takes the form of fashion or music so she created some outfits in her fashion sketch book, cut out pics of her favorite outfits from her rags (I mean Tween Tiger Mush magazines) OK WHATEVER I did the same thing when I was her age, just admit it YOU did too, say it out loud 'I had pics of Duran Duran & Tears for Fears on my bedroom walls' WHEW that feels better  [FYI Pandora's 80s Pop Radio ROCKS with it my Creative Lair has become 24/7 of karaoke complete with tween eye-rolling:)] 


Fashion Collaging


More fashion collaging


Finished fashion collage
Close up of the vintage buttons LOVE the 80s look of the chain one at the top
G2 then took her mad fashion skillz to help me with this thrift store redo for part of G1's back to school wardrobe....this hideous fully flammable polyester number was like 10 ft long and a mile wide but taken in and chopped to the teen queen's chosen length, change the buttons to 'new' vintage buttons, add some shiny ribbon trim to give it some 'bling' and there ya go a unique skirt that NO ONE else at school will have

Original Thrift Store Skirt

Finished skirt redo


Got to run have a bunch more thrift store finds to redo before school starts...serious how cool is this...grab a few plain shirts, some leggings and you have lots of outfits to mix and match at very low cost!  What will you create today?

Total Pageviews

Page Tracker

Pagerank

Labels

Sewing (135) Girls (90) family (87) Inspiration (78) Holiday (48) Nature (41) Backyard (38) vintage sewing (38) thrifting (36) hand sewing (35) Taichi Tabananica (33) cats (30) recycle sewing (27) Mad Scientist Monday (24) music is art (23) hand embroidery (22) 365 Challenge (20) embroidery (20) Memory Lapse (19) Scenes from my Sketchbook (19) Silence will Fall (19) homeschooling (19) Touch My Stitches (17) art (14) Cooking (12) Scrapbusting (12) 80s (11) costumes (11) fabric collage (11) S#*ts and Giggles (10) Tshirt Blanket (10) vintage fabric (10) altered book (9) Covered in Stitches Contest (8) Flashback Creations (8) a good book (8) contest (8) crafting (8) flowers (8) sketching (8) Halloween (7) Sunday Best (7) Tshirt Pillow (7) beads and stones (7) books (7) Japan (6) Touch Me Thursday (6) business is an art (6) buttons (6) clothes (6) snow (6) Friends (5) Momtastic's Whimsey (5) New Mexico (5) Whimseybox (5) christmas (5) colorful blankets (5) cosplay (5) fabric (5) Albuquerque (4) Classes (4) Copic (4) Momtasterrific Craftery nights (4) needlepoint (4) painting (4) pillows (4) sewing machines (4) stuffie (4) vintage goodies (4) vintage patterns (4) aprons (3) crafting for a cause (3) doctor who (3) felt creations (3) movies (3) paper collage (3) woodland friends II (3) Acts of Kindness (2) Aki Matsuri (2) Artfire (2) Comic Con (2) Creative Lair (2) Easter (2) HB Happy Stacker (2) Mediterranean Viewscape (2) Memory Gifts (2) Memory Pillows (2) Space (2) Summer (2) UrbanThreads (2) Video Games (2) antiques (2) birthday (2) crafting event (2) dog costume (2) feltie (2) kid art (2) memory blankets (2) ornaments (2) recycling (2) roses (2) scarves (2) sculpture (2) upcycling (2) working on (2) 1 million pillowcase challenge (1) 10% (1) 70s (1) 8mm (1) ATC (1) Chinese Calligraphy (1) Craft and Cake (1) Give Back (1) Giveaway (1) Haunted House (1) Home Renovations (1) IHSW (1) Int'l Hermit and Stitch Weekend (1) Kiva (1) Lovelight (1) Monkeys (1) Mother's Day (1) Operation Castle Redo (1) Pens and Markers (1) Scotland (1) Spongebob Squarepants (1) Tabjuice (1) anime (1) architecture (1) bags (1) batik (1) colcha (1) collaboration (1) craft night (1) crocheting (1) curtains (1) decorating (1) doodle (1) forest fire (1) hair (1) jewelry (1) kid pranks (1) knick knacks (1) linens (1) manga (1) masks (1) monsters (1) nerd goodness (1) pokemon (1) printing (1) raven (1) repairs (1) ribbon (1) shells (1) snaps (1) solstice (1) star trek (1) steampunk (1) stockings (1) thread (1) vampires (1) weaving (1) website (1)