Showing posts with label recycle sewing. Show all posts

6.5.12

Sunday Best #6: Thrifted Vintage to Modern Teen Dress

Day 286:  When my girls have to get dressed up they have never been ones to want to just go out and get a dress off the rack.  They usually come to me with a few drawings or colors and ideas and we see what we can put together.  While I don't mind making them an outfit from scratch I prefer to upcycle vintage clothing, plus its more of a challenge for my skills.  So off we went to the thrift store and this was the first dress my teen found in the color she wanted~plus bonus is she can use it as one of her cosplay costumes.

Here is the front of the finished version of this mini dress, paired with the thrifted tall boots.

 I am thinking this dress is from the 60s or 70s and it was homemade.  Most likely a ball or bridesmade or prom dress as it was very long and flowing.  The best part of this was the trim and the sparkle in the red fabric.

She wanted it short so we trimmed it to mid-thigh.  I hand sewed the hem and cut the lining to just above the hem so it would swing loose underneath.

The back finished version of the dress. Here you can see where the ribbons on the bow hang down. Each part of the back detail were sewn on separately and really stood up to a night of dancing and sitting.

Close-up of the trim that is at the waist and neckline.

One detail my daughter wanted was a big bow on the back.  She also loves steampunk and bustle details on historical dresses.  We drew up a simple design and using all the portion we cut off the dress were able to come up with a bow that has the top corners handstitched to the dress and a simple draped bustle that is sewn in loops and gathers all meeting at the center point under the bow.

Another shot of the vintage trim that runs along the neckline, bust and waist.

This dress will be worn many times and was a huge hit for being so unique.  It was an extremely simple upcycle for the end result.  

What will you create today?

30.4.12

Mad Scientist Monday #21: Where HAVE you been?

Day 283  Sewing, attending end of school year activities and more sewing.  Trying to fit blogging in but some days it just gets away with me and unless I grow 4 more hands or clone myself I just need to spend the time working on sewing or with my family.  Choices, choices and if blogging get the short end of the stick, so be it.  

Today I chose Molly Weasley as my 'Mad Scientist' because she is one of the greatest, most loving, fiercely protective moms I have seen in literature.  And because when I was cleaning and purging a bucket of craft supplies this weekend I happened upon a broken wooden square clock which I am going to make into our own version of a the Weasley's clock~don't we all wish we had one?  Here's a guy who is really attempting to make a version of it using social media~I forsee something like this being a very possible part of the future tech frontier!

Image from HarryPotter.wikia.com

These are my favorite clothes I worked on these past few weeks for LoveLight Boutique to use in a couple of fashion shows.


There were a few end of year field trips.  This Bullfrog was like a foot long~crazy.

And water polo games.  My oldest was in the high school State tournament this weekend and their team of 8 got 2nd~exciting stuff!

Ok gotta get back to it...what will you create today?

16.4.12

Get my Thrills Thrifting #10: Off the Shoulder Creations

Day 281  FINALLY finished another really awesome project.  Bill Fort, the Owner and Artist behind Lovelight Boutique gave me a hand drawn design and some thrifted fabrics to turn into off the shoulder creations.  

Find these and other unique creations at Lovelight Boutique here in Albuquerque 147 Harvard Dr. SE, one block from UNM and Central! Or check out Lovelight's Facebook page  it really has a selection that makes you want to put the fun back in fashion again!  

I love turning 2D ideas into tangible goods.  It keeps the creative brain working overtime!
This blue one is a sort of crepe material but sturdier.  It has a nice flow and feel to it.

 This nautical satiny print is my favorite of the bunch.  Very soft.

 This was originally a large polyester scarf but was too skinny to fit over my mannequin.  Very cute sheer print.

A cotton tie dye print.  Reminds me of Summer!

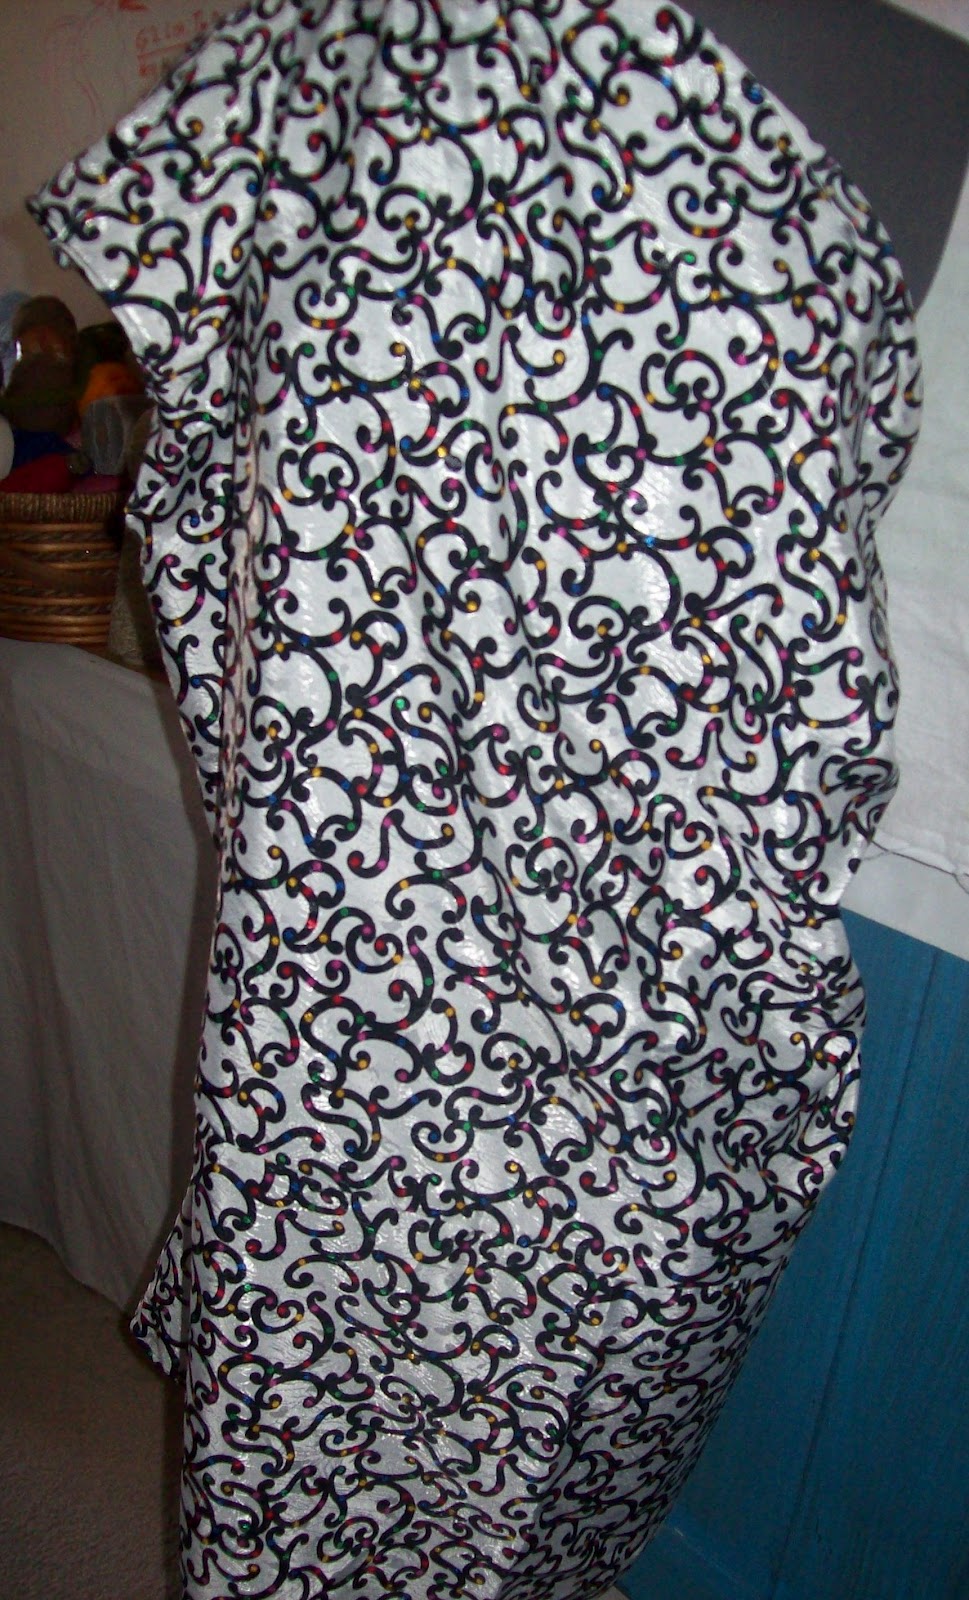
I am calling this the mardi gras print because it was satiny with a white on white sparkly print and over that the black ironwork type swirls and multicolored dots.  Very silky on the skin.


Here are a couple of examples of how they look like on.  You can wear them so many ways...just plain off the shoulder, cinched up with a sparkly brooch on one side or both or tied and draped over a cute belt!  This is the type of top that can be used to dress down or dress up depending on how it is worn.

Go check out these and other creations at Lovelight Boutique!


What will you create today?

21.3.12

Touch My Stitches #17: What stains? Hand embroidery on a tshirt!

Day 276   I am so proud of this shirt that I just completed hand embroidering.  It had dark stains on it and just was a loss with the already gorgeous embroidery.   I could have used a machine but really I didn't want to take the chance that the machine would catch on the original design and I knew I needed to create something that would cover the stains but not take center stage.

First I went and matched threads to the original colors to incorporate into the new art.  They are Sulky 100% Rayon. I knew at least for the front design that I wanted to use red so it could blend in with the shirt and cover the stain but be in the background.  I used Size 10 Big Eye Quilting needles with a Gold Eye and sharp points. I needed a needle thin enough with a sharp tip to be able to get through without causing huge holes in the knit and it had to be small to work the stitches in small strokes.  May not be for everyone but works for me!

Here is the smaller stain on the side back.

The butterfly and artistic graphics led me in an Asian/Indian direction when I went to search through clip art for a flower that would easily go under the butterfly.  I hit upon a lotus flower and then freehanded this smaller one in white pencil from the larger one I will show you later in this post.  You can see the stain I was covering and the stem started in this picture.

Stitching on knit will cause it to stretch and gather where you don't want it too so I stabilized it on the back with a used unscented dryer sheet ironed flat.  Laying the shirt flat I sprayed basting spray on the dryer sheet and then placed it onto the shirt.  You want to use a larger area of stabilizer than your design to well keep it stable and when you are finished you can carefully cut away down to the size of your design.  I use the dryer sheets because even leaving the bits on the back it will not be scratchy when worn  and will wash/dry along with shirt.

Here it is finished and trimmed down.


I amazed myself with how this came out.  Art does not always go from concept to concrete easily.  And see no stain!  Satin stitching on the outlines with straight stitches sketching out the petals.

Next the larger stain on the front.  I am thinking it was grease of some sort because it was hardened and was difficult to stitch through.

First choosing a design and then the size. I went with the smaller one.

Then to make it easier to sketch out I poked holes at all the points.

Using a fine point sharpie I 'dotted' in each of the pin holes.  And using a white pencil it was a game of connect the dots!  I miss connect the dots.

Then over the white pencil I connected the dots with thin red stitches so be able to follow the design.

Spraying and placing the dryer sheets for stabilizing.  I did more because initially I was going to do a stem all the way down but after working the petals I nixed that idea as too much.

Stabilizer cut and trimmed after finishing.


Here it is!  Red stem stitching with the brownish-green along the bottom as leaves cupping the blossom and then running stitch criss crossed in pink as a sort of lacy center covering the stain and defining the center of the bloom but not taking away from the butterfly. FYI if you want to see the pictures closer because it is damn hard to photograph red on red click on them to make larger.


All in all this took about 40 hours but well worth it because I think it looks stunning and disguised the stain.  GO ahead and call me crazy but I just trust my hands more with delicate work like this, I feel I have more control.

Adding in these pics without flash so you can see the flower better....


So the shirt went from this.....

...to this....

What will you create today?

18.2.12

I Get My Thrills Thrifting #7: Aprons and Vintage Sewing Books

Day 263   Having a bit of trouble with the new Taichi format so hopefully we will get it out tomorrow.  In the meantime you will have to just be satisfied with a few treasures from our thrifting adventures.

  I love sales at thrift stores.  Picked up a bunch of unique pillow cases for my reclaimed fabric aprons that will be coming out starting this week.

Found this gem sitting amongst the books.  Excellent condition for a paper booklet.  I might just have to make some of these shirts up for the hub.

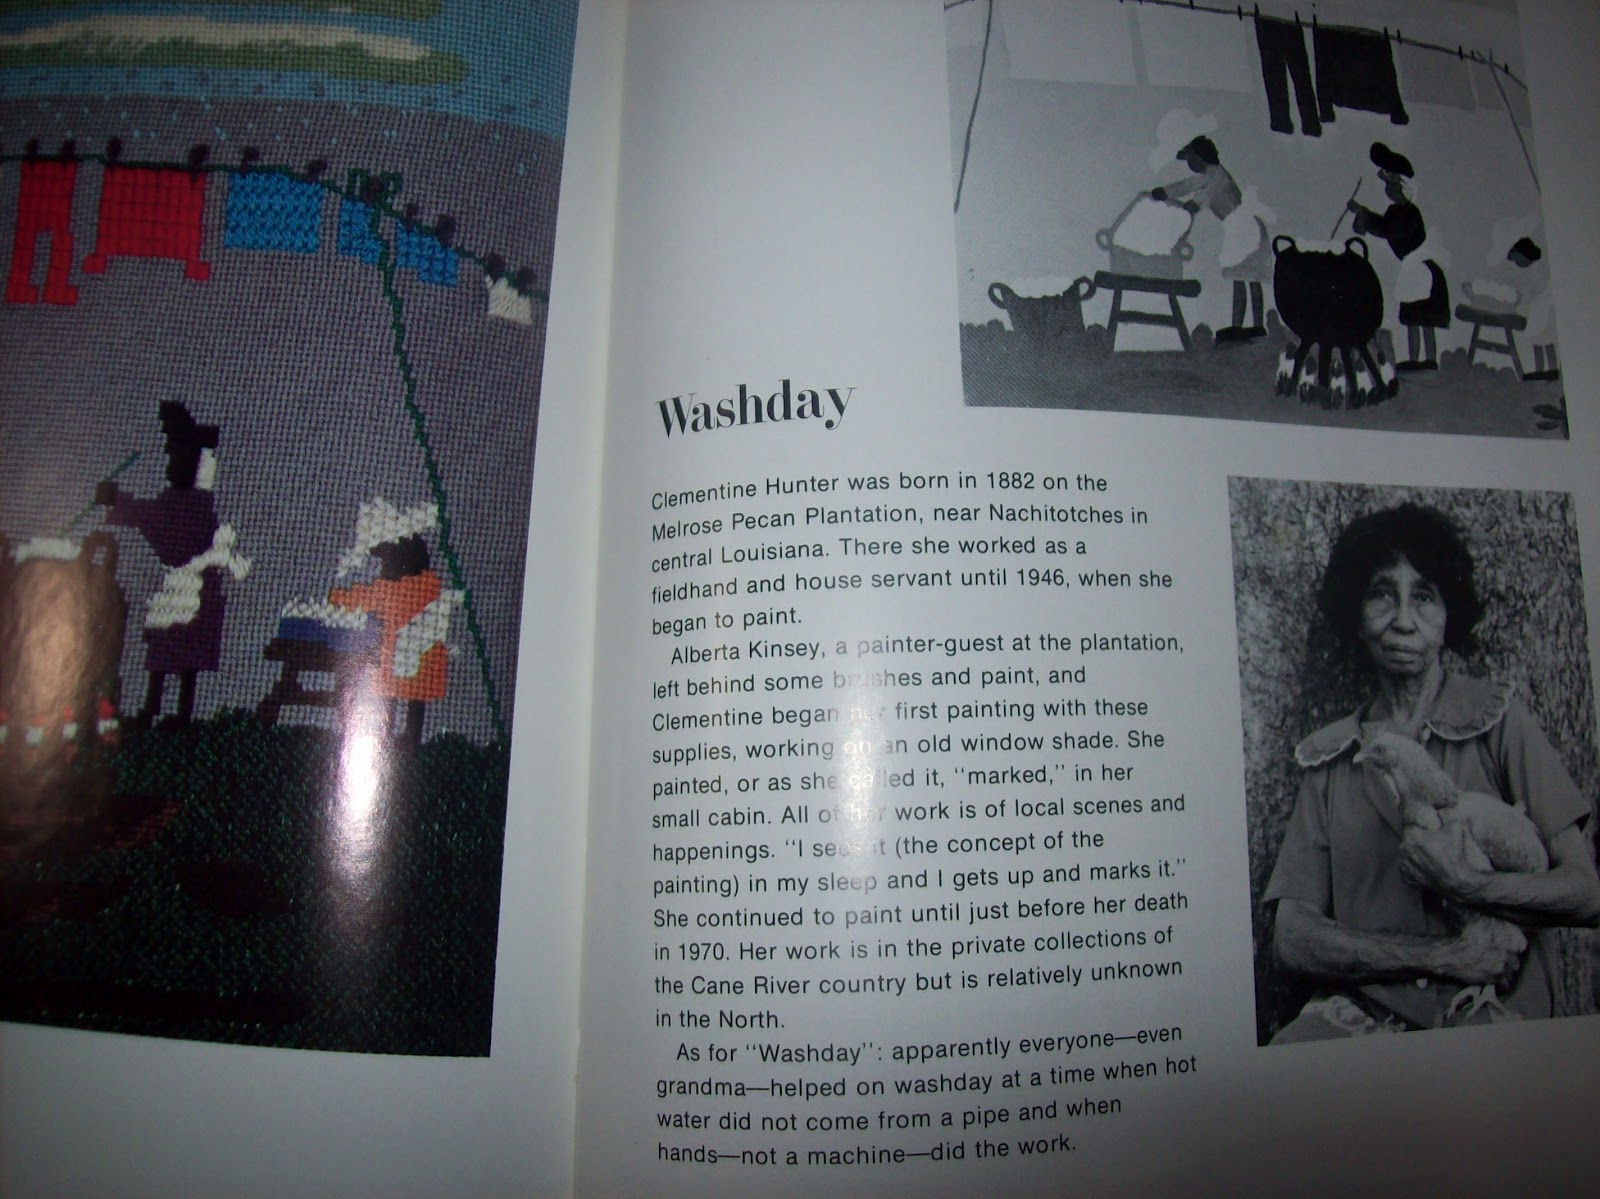
This was my favorite find of the week.


And it came for patterns for each featured item in the book.  I just love seeing history all wrapped up in sewing and needlepoint.


What will you create today?

Total Pageviews

Page Tracker

Pagerank

Labels

Sewing (135) Girls (90) family (87) Inspiration (78) Holiday (48) Nature (41) Backyard (38) vintage sewing (38) thrifting (36) hand sewing (35) Taichi Tabananica (33) cats (30) recycle sewing (27) Mad Scientist Monday (24) music is art (23) hand embroidery (22) 365 Challenge (20) embroidery (20) Memory Lapse (19) Scenes from my Sketchbook (19) Silence will Fall (19) homeschooling (19) Touch My Stitches (17) art (14) Cooking (12) Scrapbusting (12) 80s (11) costumes (11) fabric collage (11) S#*ts and Giggles (10) Tshirt Blanket (10) vintage fabric (10) altered book (9) Covered in Stitches Contest (8) Flashback Creations (8) a good book (8) contest (8) crafting (8) flowers (8) sketching (8) Halloween (7) Sunday Best (7) Tshirt Pillow (7) beads and stones (7) books (7) Japan (6) Touch Me Thursday (6) business is an art (6) buttons (6) clothes (6) snow (6) Friends (5) Momtastic's Whimsey (5) New Mexico (5) Whimseybox (5) christmas (5) colorful blankets (5) cosplay (5) fabric (5) Albuquerque (4) Classes (4) Copic (4) Momtasterrific Craftery nights (4) needlepoint (4) painting (4) pillows (4) sewing machines (4) stuffie (4) vintage goodies (4) vintage patterns (4) aprons (3) crafting for a cause (3) doctor who (3) felt creations (3) movies (3) paper collage (3) woodland friends II (3) Acts of Kindness (2) Aki Matsuri (2) Artfire (2) Comic Con (2) Creative Lair (2) Easter (2) HB Happy Stacker (2) Mediterranean Viewscape (2) Memory Gifts (2) Memory Pillows (2) Space (2) Summer (2) UrbanThreads (2) Video Games (2) antiques (2) birthday (2) crafting event (2) dog costume (2) feltie (2) kid art (2) memory blankets (2) ornaments (2) recycling (2) roses (2) scarves (2) sculpture (2) upcycling (2) working on (2) 1 million pillowcase challenge (1) 10% (1) 70s (1) 8mm (1) ATC (1) Chinese Calligraphy (1) Craft and Cake (1) Give Back (1) Giveaway (1) Haunted House (1) Home Renovations (1) IHSW (1) Int'l Hermit and Stitch Weekend (1) Kiva (1) Lovelight (1) Monkeys (1) Mother's Day (1) Operation Castle Redo (1) Pens and Markers (1) Scotland (1) Spongebob Squarepants (1) Tabjuice (1) anime (1) architecture (1) bags (1) batik (1) colcha (1) collaboration (1) craft night (1) crocheting (1) curtains (1) decorating (1) doodle (1) forest fire (1) hair (1) jewelry (1) kid pranks (1) knick knacks (1) linens (1) manga (1) masks (1) monsters (1) nerd goodness (1) pokemon (1) printing (1) raven (1) repairs (1) ribbon (1) shells (1) snaps (1) solstice (1) star trek (1) steampunk (1) stockings (1) thread (1) vampires (1) weaving (1) website (1)