Showing posts with label crafting. Show all posts

18.6.12

Momtastic's Whimsey #2: Summer Dreams


Day 291  Have you received your Whimseybox of craftiness or want to know more about what it is?  Click here to check out Whimseybox's website.

  I am a member of the Whimseybox Design Team and will be putting together weekly crafts and projects based on the items that come in the monthly boxes.  What I am going to try to do for my participation in the project is A. use primarily what comes in the box and B. not buy new supplies to enhance those projects but use what I have around the house.  I am proud to be a part of a group of extraordinarily crafty people.  If you want more ideas check out Whimseybox's Portfolio of projects.

Lately I have been slacking on not only blog posts but crafting with myself and my family.  I am not going to beat myself up or make excuses, we just got incredibly busy all at once and it was overwhelming and chaotic.  But because of all this busyness it reminded me that I needed to slow down and prioritize this helped me to create our list of Summer Dreams I will be showing you how to make today.

Supplies from the April Whimseybox:
Yellow tissue paper
Stencils
various buttons

Supplies from the March Whimseybox:
Various Scrapbook paper
Ultra Fine Point Sharpie
Small Round magnets
Elmer's Glue Stick

Other Supplies:
Scissors
Dreams & Imagination


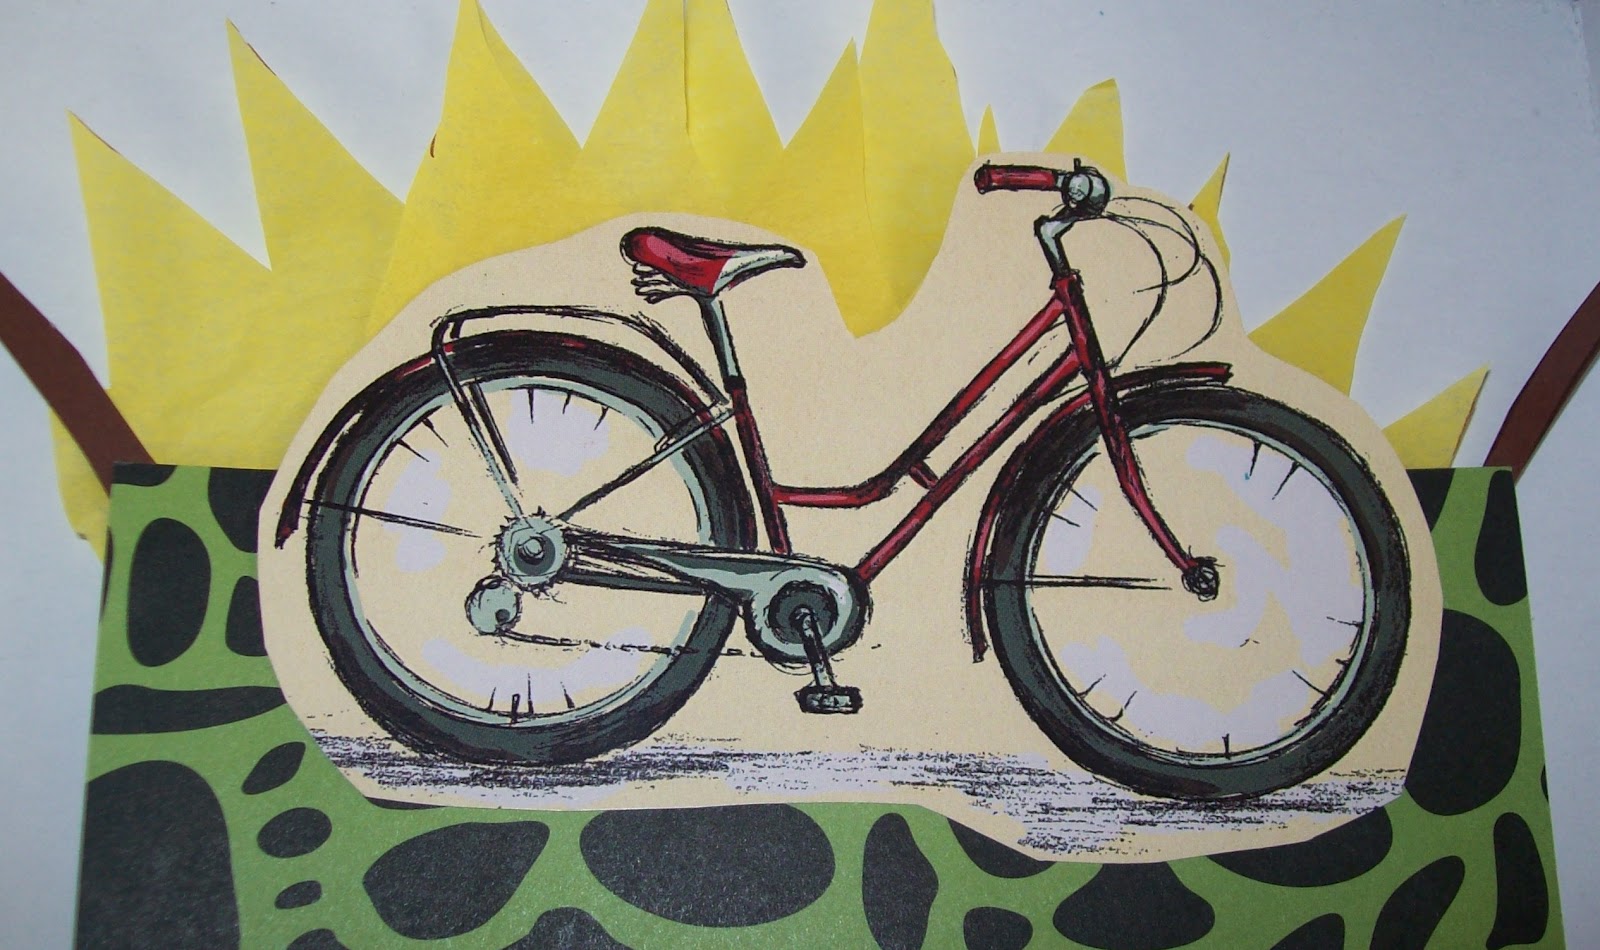
We started by trimming around the bicycle from Aprils Featured Artist work from HopScotch Graphics because I liked that the quote was speaking to exactly how I have been feeling lately with so much work, not enough play-out of balance....
“Life is like riding a bicycle, in order to keep your balance- you must keep moving.” Albert Einstein

Choose a piece of scrapbook paper that your bicycle can be riding or parked on. We chose this black on green because it reminded us of cobblestones.


Draw random 'rays of the sun' as pictured.  Does not have to be artistic or perfect because you are going to cut them out to place behind the bicycle.

Using your glue stick put the bicycle on top of the scrapbook paper, flip it over and glue the yellow tissue paper 'rays' to the back, shifting them around and overlapping them a little.  I only use 2 layers of tissue paper but you can use as many as you want.

Bonus Tip: Add more layers and color the tips of some of them with orange or red markers for more dimension.

Next we are going to surround our sun with colorful paper flowers, so choose a few of your favorite scrapbook paper colors and designs.

Grab the stencil you received in your Whimseybox~I happened to get flowers but any shape can be make into flowers~even squares.

Flip the scrapbook paper over to the back and using your fine line Sharpie trace out a few larger flowers and a few smaller shapes.  These can be cut out of whatever different designs and colors of paper you choose.

I happened to receive a stencil with the long curve to use as flower stems but if you don't have a stencil just trace a rectangle approximately 1/4" wide and 3" tall ~make it straight or curved.

Glue the stems along the back of the main portion to either side of your Sun's rays.
While your stems are drying you can cut out the flower shapes.  Remember we are not looking for perfection here just have fun with your project. 

Bonus Tip: Add more flowers for a wild Summer garden of dreams.

Glue the smaller flowers to the center of the larger ones and let dry.

Glue the flowers to the stems and let dry.  Right now when you pick up your project it will be floppy but once the magnets are on and it is hanging it will not flop down.

Take some of your favorite colored buttons and glue one to the center of each of your flowers.


Take one each of your small round magnets, remove the sticky paper, stick them to the back of a flower on each side.  If really only need one on each side and maybe one in the middle if you have added more flowers.  And  the top part of your project is complete!

Grab your favorite plain colored or lightly designed piece of scrapbook paper (you can even you a piece of notebook paper cut down to size).  This bigger piece is approximately 6" long by 5" wide.

Next cut a small piece of a contrasting color 1" wide by 4" long.  I had a piece in my box with dots on it that was perfect. 

Glue the larger piece to the center bottom back of the top decoration.  Then glue the smaller scrapbook paper to the right center edge of the larger piece, as shown below.

Using your Sharpie write 'Summer 2012' on the smaller piece along the side.  Then trace lines on the larger piece of scrapbook paper approximately 1/2" wide from each other.

Write down what you have done, plan to do, dream of doing, wish you could do this Summer.  The whole family can participate and if the list needs to be longer just add another piece of paper to the bottom.

Although the bicycle art and quote made me think about balance in my life, Summer is about freedom to explore, dream and plan so NOTHING is too outrageous to put down in ink.  The key to enjoying Summer is to not get too caught up in the have to do or planning but to enjoy each minute as it is given, however it happens.

Bonus Tip:  If you scrapbook then you can just take this list and add it to the pages from this Summer afterwards!

I put this in my Creative Lair instead of on the fridge to remind me to slow down and enjoy the process more.


What will you create today?


5.5.12

Momtastic's Whimsey #1: Mother's Day Crafting

Day 285  Have you received your Whimseybox of craftiness or want to know more about what it is?  Click here to check out Whimseybox's website.

  I am a member of the Whimseybox Design Team and will be putting together crafts and projects based on the items that come in the monthly boxes.  What I am going to try to do for my participation in the project is A. use primarily what comes in the box and B. not buy new supplies to enhance those projects but use what I have around the house.  I am proud to be a part of a group of extraordinarily crafty people.  If you want more ideas check out Whimseybox's Portfolio of projects.

Today I am putting together a craft that you can make last minute for Mother's Day May 13th.  Or lets say you forget Mother's Day and you need a quick idea that morning...this is the one and it only takes about 2 hours and is fairly easy, no art skills required.  As I was working on this various family members kept coming in and giving their input so this was a collaborative family effort~as most of our art projects usually become in our house!

Supplies from the April Whimseybox:
Yellow tissue paper
Yellow satin ribbon
Bottle of Americana paint via DecoArt
Stencils
Chunky paintbrushes
4x4" artist canvas via Dick Blick Art Supplies
various buttons

Supplies from the March Whimseybox:
Various Scrapbook paper
Ultra Fine Point Sharpie

Other:
Glue
Martha Stewart's Acrylic Glitter paint
Flat thumb tacks


Take the yellow tissue paper and cut a few pieces a little larger than the 4x4" square canvas.

Put glue onto the back of the canvas and brush it on evenly.

Lay the tissue paper onto the glue.

Layer glue and tissue paper into multiple layers

I ended up doing 3 layers.  When I craft I like to really go with what feels right and this just worked for me so put as many or as few as you want! Be careful smoothing the tissue paper because it will tear.  

Put glue along the edges on the back of the yellow tissue and canvas.  I chose a pattern of scrapbook paper and glued it onto the back.    

I trimmed around the edge of the tissue paper with pinking shears.  

Next, prepping for stenciling!

I was given advice by one of my daughters that we needed to add some glitter and I happened to have some Martha's glitter paint here BUT if you don't have this spread a thin layer of clear drying glue and sprinkle your own glitter onto it.   

I brushed the glitter paint on and then used a scrap of tissue paper and blotted it onto the paint to break up the brush lines.

After the tissue paper blotting it looks smooth and even.  Let the paint or glue dry to the touch.

Put the flower stencil in the center of the canvas.  Holding the stencil use your chunky paint brush lightly dab the paint onto your canvas.  

Let this dry to the touch.

Squeeze a small amount of paint into a lid or paint dish.  Call your kids and let them dip their finger into the paint~tapping off any excess~then have them make little fingerprints around the edges of the flower.  Since I have 2 kids I let them each do five alternating along with each flower petal on the stencil.

After another family member walked into the room I was given the suggestion to also put a little flower stencil in each of the corners of the canvas

Then just free draw approximately 2" letters 'M' and 'O' onto random patterns of the scrapbook paper and cut them out.

I glued the 'MOM' letters onto the edges of the canvas.

To hang the canvas I looped the satin ribbon behind the canvas and attached it using 2 thumbtacks (the flat kind not pushpins) placed into the wood frame.

After the paint has completely dried you can use an ultra fine point Sharpie to add details into the flowers.  Later I went back and placed small buttons into 2 of the flowers in the corners because I very obviously drew the lines wrong :) but hey making mistakes is a part of art and its how you work around it instead of giving up that is important.

HAPPY MOTHER'S DAY! 


 What will you create today?


13.2.12

Mad Scientist Monday #19: Organizing the resistance of the loose threads.

Day 260  Today its all about Mad Mod from Teen Titans or Mad Mod Poet God, such a crazy mixed up character with all the right lines.  His psychedelic backdrops and references just rocked and I miss watching this show.


I have been looking for a small travel case to carry my threads, scissors and embroidery supplies.  My youngest came across this case at a local thrift store and she knew it was exactly for me.

Originally it was a Smashing Pumpkins CD case thingy.


I just ripped out that plastic thing leaving a little bit of ripped paper on the sides.  Still have not decided what I want to do with it but I have some spray paint that might be just right.

I grabbed this scrap piece of Halloween fabric I had on hand because it was a print I like and roughly the dimensions of the inside of the lid.  I may change this out later if I find a 60s psychedelic scrap.


I machine sewed the right sides together, turned it inside out, then stuffed it full.


Here is my little pillow before gluing.


I glued it into the bottom part of the lid, squishing to the side so it would be stiff enough to use as a pincushion.  Then for extra sewing cuteness I glued 2 old wooden small thread spools in so I can use the holes to hold things when it is open.


Here is what it looks like open, with my my new needle and pin cushion in place.  The main part of the case will carry the threads for my current project and all the random loose strays leftover from other projects.


See I can now close it up and the needles stay right where I put them!


I know I haven't totally finished decorating this cute little case yet, it doesn't feel complete and totally representative of me, so I will be patient to see what I come across that fits the Mod vibe of this case.  Right now it is perfect for carrying all my stuff and I love that it locks tight.


It is so much fun to recycle and see what happens.  Sometimes it works and some days it is a bust, but we keep trying.  What will you create today?

Total Pageviews

Page Tracker

Pagerank

Labels

Sewing (135) Girls (90) family (87) Inspiration (78) Holiday (48) Nature (41) Backyard (38) vintage sewing (38) thrifting (36) hand sewing (35) Taichi Tabananica (33) cats (30) recycle sewing (27) Mad Scientist Monday (24) music is art (23) hand embroidery (22) 365 Challenge (20) embroidery (20) Memory Lapse (19) Scenes from my Sketchbook (19) Silence will Fall (19) homeschooling (19) Touch My Stitches (17) art (14) Cooking (12) Scrapbusting (12) 80s (11) costumes (11) fabric collage (11) S#*ts and Giggles (10) Tshirt Blanket (10) vintage fabric (10) altered book (9) Covered in Stitches Contest (8) Flashback Creations (8) a good book (8) contest (8) crafting (8) flowers (8) sketching (8) Halloween (7) Sunday Best (7) Tshirt Pillow (7) beads and stones (7) books (7) Japan (6) Touch Me Thursday (6) business is an art (6) buttons (6) clothes (6) snow (6) Friends (5) Momtastic's Whimsey (5) New Mexico (5) Whimseybox (5) christmas (5) colorful blankets (5) cosplay (5) fabric (5) Albuquerque (4) Classes (4) Copic (4) Momtasterrific Craftery nights (4) needlepoint (4) painting (4) pillows (4) sewing machines (4) stuffie (4) vintage goodies (4) vintage patterns (4) aprons (3) crafting for a cause (3) doctor who (3) felt creations (3) movies (3) paper collage (3) woodland friends II (3) Acts of Kindness (2) Aki Matsuri (2) Artfire (2) Comic Con (2) Creative Lair (2) Easter (2) HB Happy Stacker (2) Mediterranean Viewscape (2) Memory Gifts (2) Memory Pillows (2) Space (2) Summer (2) UrbanThreads (2) Video Games (2) antiques (2) birthday (2) crafting event (2) dog costume (2) feltie (2) kid art (2) memory blankets (2) ornaments (2) recycling (2) roses (2) scarves (2) sculpture (2) upcycling (2) working on (2) 1 million pillowcase challenge (1) 10% (1) 70s (1) 8mm (1) ATC (1) Chinese Calligraphy (1) Craft and Cake (1) Give Back (1) Giveaway (1) Haunted House (1) Home Renovations (1) IHSW (1) Int'l Hermit and Stitch Weekend (1) Kiva (1) Lovelight (1) Monkeys (1) Mother's Day (1) Operation Castle Redo (1) Pens and Markers (1) Scotland (1) Spongebob Squarepants (1) Tabjuice (1) anime (1) architecture (1) bags (1) batik (1) colcha (1) collaboration (1) craft night (1) crocheting (1) curtains (1) decorating (1) doodle (1) forest fire (1) hair (1) jewelry (1) kid pranks (1) knick knacks (1) linens (1) manga (1) masks (1) monsters (1) nerd goodness (1) pokemon (1) printing (1) raven (1) repairs (1) ribbon (1) shells (1) snaps (1) solstice (1) star trek (1) steampunk (1) stockings (1) thread (1) vampires (1) weaving (1) website (1)