Day 285 Have you received your Whimseybox of craftiness or want to know more about what it is? Click here to check out Whimseybox's website.
I am a member of the Whimseybox Design Team and will be putting together crafts and projects based on the items that come in the monthly boxes. What I am going to try to do for my participation in the project is A. use primarily what comes in the box and B. not buy new supplies to enhance those projects but use what I have around the house. I am proud to be a part of a group of extraordinarily crafty people. If you want more ideas check out Whimseybox's Portfolio of projects.
Today I am putting together a craft that you can make last minute for Mother's Day May 13th. Or lets say you forget Mother's Day and you need a quick idea that morning...this is the one and it only takes about 2 hours and is fairly easy, no art skills required. As I was working on this various family members kept coming in and giving their input so this was a collaborative family effort~as most of our art projects usually become in our house!
Supplies from the April Whimseybox:
Yellow tissue paper
Yellow satin ribbon
Bottle of Americana paint via DecoArt
Stencils
Chunky paintbrushes
4x4" artist canvas via Dick Blick Art Supplies
various buttons
Supplies from the March Whimseybox:
Various Scrapbook paper
Ultra Fine Point Sharpie
Other:
Glue
Martha Stewart's Acrylic Glitter paint
Flat thumb tacks

Take the yellow tissue paper and cut a few pieces a little larger than the 4x4" square canvas.
Put glue onto the back of the canvas and brush it on evenly.
Lay the tissue paper onto the glue.
Layer glue and tissue paper into multiple layers
I ended up doing 3 layers. When I craft I like to really go with what feels right and this just worked for me so put as many or as few as you want! Be careful smoothing the tissue paper because it will tear.
Put glue along the edges on the back of the yellow tissue and canvas. I chose a pattern of scrapbook paper and glued it onto the back.
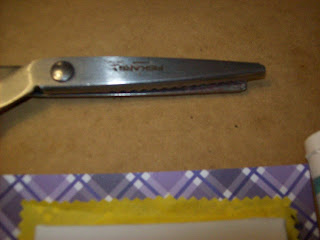
I trimmed around the edge of the tissue paper with pinking shears.
Next, prepping for stenciling!
I was given advice by one of my daughters that we needed to add some glitter and I happened to have some Martha's glitter paint here BUT if you don't have this spread a thin layer of clear drying glue and sprinkle your own glitter onto it.
I brushed the glitter paint on and then used a scrap of tissue paper and blotted it onto the paint to break up the brush lines.
After the tissue paper blotting it looks smooth and even. Let the paint or glue dry to the touch.
Put the flower stencil in the center of the canvas. Holding the stencil use your chunky paint brush lightly dab the paint onto your canvas.
Let this dry to the touch.
Squeeze a small amount of paint into a lid or paint dish. Call your kids and let them dip their finger into the paint~tapping off any excess~then have them make little fingerprints around the edges of the flower. Since I have 2 kids I let them each do five alternating along with each flower petal on the stencil.
After another family member walked into the room I was given the suggestion to also put a little flower stencil in each of the corners of the canvas
Then just free draw approximately 2" letters 'M' and 'O' onto random patterns of the scrapbook paper and cut them out.
I glued the 'MOM' letters onto the edges of the canvas.
To hang the canvas I looped the satin ribbon behind the canvas and attached it using 2 thumbtacks (the flat kind not pushpins) placed into the wood frame.
After the paint has completely dried you can use an ultra fine point Sharpie to add details into the flowers. Later I went back and placed small buttons into 2 of the flowers in the corners because I very obviously drew the lines wrong :) but hey making mistakes is a part of art and its how you work around it instead of giving up that is important.
HAPPY MOTHER'S DAY!
What will you create today?


No comments:
Post a Comment